Monday, October 15, 2012

Pumpkin Mac


Hello, Hello!

I have been anticipating Monday with, well, much anticipation! I am a little excited to bring you this recipe.

All things pumpkin and apple in my kitchen, lately. And it has been wonderful. I'm gonna' share some of that kitchen wonderful, with you.


Starting with Pumpkin Mac.


Pumpkin in macaroni and cheese? I was scared at first. Worried. Added only a little bit of pumpkin puree at a time, and then did a little bitty taste test.

So super-stoked! It was quite delicious.

I should mention that it does not taste like pumpkin pasta. It tastes like a rich, slightly sweet, macaroni and cheese. I have tried a lot of different plant-based macaroni and cheese recipes. This one is easily my absolute, go-to favorite. My kids agree.

I am trying really hard not to rant and rave about my own recipe here. But I did have quite a few taste testers at my house over the weekend, and they couldn't get enough of it. They were not vegans, either. They had just had dairy cheese that day.

Paul, Essie and I, all agree that it is better than my butternut squash macaroni and cheese. But you will have to decide that for yourself.

And you know, it was time to shake things up a bit.

Variety is the spice of life.


Some definite pros about this recipe here. One is, well, I think you're really gonna' like it. And two, it's quite festive and healthy.

But how about some busy chef benefits here, huh?

The cheese sauce takes less than 9.674 minutes to make.

No cooking butternut squash. Just open a can of pumpkin puree, measure it out, and throw in the blender with your cheese sauce ingredients, and ooooh la la.

Dinner in less than 10 minutes. Or lunch. If you use brown rice pasta shells, it may take longer for your pasta to cook than for your sauce to be ready.

And. Some of us had quite the difficulty buying butternut squash off-season. Even in trying to find it in the frozen vegetable section. Pumpkin puree may be more widely available. Or at least gives us another option. Yay!

So, when you find yourself with 9.674 minutes, I hope you make this recipe.


Happy Monday, and Happy Eating!!


PROJECT VEGAN KIDS
VEGAN FAST FOOD!


Pumpkin Mac
By Ashlee Crozier

Note from Ashlee: I don't know why I always make my mac n cheese with penne pasta. As with the butternut squash macaroni and cheese, I do not recommend you use whole wheat pasta. I do recommend white pasta. Especially for transitioning children. Make sure you carefully measure everything with exactness, otherwise I don't know how the recipe will turn out.

Ingredients:

4 cups dry macaroni (use whole grain pasta if possible, I like brown rice pasta shells)
1 cup full-fat coconut milk from a can
2 cups water
1/3 cup nutritional yeast flakes
3 teaspoons salt
1 cup (scantly measured) raw cashew pieces
1/4 cup, or 1/2 of a roasted red bell pepper (pimentos, packed in water)
1 tablespoons lemon juice
1/4 cup cornstarch
1 teaspoon onion powder
3/4 cup 100% pumpkin puree (not pumpkin pie mix, use up to 1 full cup if you choose)

Directions:

1.)Cook pasta according to package directions.

2.) Place all the ingredients in your blender, except of course, for your pasta! Taking care to measure everything carefully. Blend on high until very smooth, and little to no grittiness is felt when you rub the sauce between two fingers. You may need to run your blender through a couple of cycles.

3.) Drain your pasta and return to cooking pot.

4.) Do not add all of the sauce to your macaroni and cheese! We all have different tastes and some of us like more cheesy pasta than others. Pour blended mixture, a little at a time, into hot, drained macaroni until you have reached the cheesy texture you would like. I probably added about two cups of sauce to 1 pound of pasta. You may want more. Cook together, stirring gently and constantly, until thick.

5.)Freeze remaining sauce immediately, in a freezer-safe Ziploc bag. Unless, of course, you are going to eat this again for your next meal. With more cooked pasta. I'm not against it. (The sauce only lasts about 2-3 days in your fridge, don't wait for it to start getting bad first, and then freeze it. I have made that mistake before.) To thaw, simply place in a sink-ful of very hot water for about 10 minutes, then heat it in a stock pot to thicken, add pasta.


[UPDATE 10 25 2012] VARIATION: Rachel, a reader and friend, has been very successful using an entire 15 oz. can of coconut milk and an entire 14.5 oz can of pumpkin puree. I tried it too, and it tasted quite good. This version is a bit more bland, (not such strong flavors) and works well with small children who like more bland foods. It tasted closer to boxed macaroni and cheese (kraft stuff) and less like homemade macaroni and cheese. I like both variations, and couldn't pick a favorite, but Paul's tastes prefer my original version. You are welcome to try either and see what is your favorite. This variation makes a ton of sauce! Be prepared to freeze some in Ziploc gallon freezer bags.


*****

What festive food would you like to eat next? I will post it tomorrow!

Pumpkin Pie Smoothie


Apple Crisp
(Gonna' do a new photo shoot for this one!)


Pumpkin Bread


Thursday, October 11, 2012

Fried Tofu // Incorporating Soy in Your Child's Life


Transitioning to a plant-based diet was very difficult for my kids. At first. Especially for my oldest, Essie.

Another one of the unforeseen negative side affects of trying low carb, was that I had trained her palate to enjoy meat, cheese, heavy cream, eggs, and salmon in particular.

It was hard for her. She struggled. In one week I had completely changed her menu. No eggs for breakfast, meat and cheese for lunch, and hot dogs for an afternoon snack. No salmon for dinner.

Looking back on that I shake my head. Literally. What a SAD menu. Where were the whole grains? The fruit, vegetables, raw nuts, beans? No where to be found.

What a tragedy.

But unlike dramatic plays, this tragedy has a happy ending. Or beginning. Depending on which way you look at it.

It's called tofu. Soy. If prepared and presented the right way, kids love. Of course, I try with every meal to incorporate as many nutrient-dense foods as possible for my children, but soy foods really help them get the calories they need. I do not use soy as a replacement for other nutrient dense foods, but rather, in addition to them -- as a side.

The first time Essie tried crispy tofu, I saw the gears turning in her head. Excitement. And I could see that she decided that this eating veg thing wasn't so crazy after all. She could do it. Enjoy it.

So, I thought I would write about some of our favorite soy foods. (See my and Dr. Joel Fuhrman's opinion on whole soy foods, here.)

Starting with the basics. Soy milk. My children's favorite non-dairy milk, it is creamy, a little bit fatty, higher in calories than almond milk, and delicious.


Organic, unsweetened, enriched with calcium, vitamins A and D, and a good source of Vitamin B12. (All vegans need supplementation with vitamin B12.) They love it poured all over their breakfast oatmeal, cereal, or Mighty Tasty Hot Cereal. They also drink it straight out of a cup, with their meals, or use it for dunking cookies.

Next would have to be soy yogurt. I'm tellin' ya we are all addicted to this stuff. I have tried other yogurts -- almond, coconut, etc, and they cannot compete with the flavor or texture.


I hope you get a chance to go to Trader Joe's and try soy yogurt like this. For $2.49 per large container, it's affordable and every week I buy about 4-5 of these. Seriously. Addicted. It contains live probiotic cultures; helpful for the digestive system. This yogurt sells fast at TJ's so go during the week, especially in the morning to make sure you get some. Just a little trick I learned. It's always gone on a Saturday evening.

If you don't have a Trader Joe's, Whole Foods Market also carries Silk Soy Live! yogurt, large container for about the same price. I don't find it to be as tasty as TJ's yogurt, but remember that you can always add some sugar or other flavorings (maybe some fruit jam?) to yogurt to make it tastier.

We eat it as a snack, and I also use it to replace oil in my baked goods (use half the amount than oil). Because it contains fat, and is quite thick, I think it tastes much better as an oil replacement than applesauce does. Kids need fat. I am convinced. They want it, crave it, love it.

Essie had first tried crispy tofu at a restaurant. They deep fry it. Wow. Is this stuff good! I am working on going to a Thai Diner and asking to buy their deep fried tofu (sounds terrible, I know, but kids need fat) directly from them. No way am I buying a deep fryer.

Until then (I'll let you know how that turns out) I love using pre-baked, organic, seasoned tofu. Trader Joe's sells three different flavors; BBQ, Savory, and Teriyaki. I am sure other health food stores carry similar products. I just haven't looked because we are happy with TJ's.


What I do: open a package of pre-baked, seasoned tofu, and slice them into cubes or bite-size slabs. I try to maximize the surface area so that it can get toasted well and become pretty crispy. Get a nonstick skillet, and pre-heat to medium-high heat. Throw cubes in the skillet without any oil, and brown on both sides. Makes it crispy and warm. Serve with ketchup, BBQ sauce, ranch dressing, or their favorite sauce. My kids love this, and clamor over who gets the last piece.


For Sandwiches: Take a block of pre-baked, seasoned tofu, and either chop it fine with a knife or pulse it in the food processor until fine. Immediately press it into hummus that has been spread over some whole grain bread. The tofu loses moistness if you wait too long, and doesn't stick in the hummus as well. Spread a second slice of bread with hummus, and put the two pieces together to form a sandwich. I try to press/compact as much tofu in the sandwich as possible.

I also love using the Teriyaki tofu in our VERY favorite Thai Noodle dish.

Kids love ice cream, creamy treats. I mostly make banana ice cream for them in my food processor, but I also buy soy ice cream, and soy ice cream novelties.


One of their favorite treats is chocolate milk. Pictured is the almond chocolate milk because it was in my fridge, but soy chocolate milk is also commonly sold (even at Wal-Mart!) and is very delicious!


Not every child enjoys meatless hot dogs. I don't think they taste fantastic. But for some reason, my kids really like them. It helps to have them on hand for immediate snacks. Just follow the directions on the back of the package for the best results in preparation.


Tofurky, a sliced deli meat, is also available (pictured at the very top). I do think that this stuff actually tastes good. Pair it with mayo or some hummus your kids like, and you have a sandwich. Or, if you are like Samuel, you munch on it plain. Samuel and Megan love it. It is a more refined food, so I do avoid serving it to them, and strongly prefer to serve them organic tofu.

Sprouted organic tofu. Or sprouted organic tempeh (another tofu product). Fried my way. The Dreena Burton way. Yummy!


What I do: Remove tofu from package, and carefully pat/press dry with paper towels. Cut into cubes, and marinate for 20 minutes. Toss in corn starch. Fry in 3 tablespoons of oil on high heat. Serve with ketchup.


PROJECT VEGAN KIDS
VEGAN FAST FOOD!
(If you marinate the tofu/tempeh for 15 minutes or less.)


Pan-Fried Tempt-eh! Or Tofu!
By Dreena Burton, from "Eat, Drink, & Be Vegan."

Makes 5-6 servings as a side dish or nibbler, or 3-4 servings as an entree.
Wheat Free
Gluten Free if you use tofu and corn starch

Note from Ashlee: Although this recipe is for tempeh, my children find both tofu and tempeh very appetizing. I have tried baking my tofu with seasonings and my kids and I do not enjoy it. They like it crispy (because there is so much oil, I try not to eat this!). These are a great replacement for the chicken nugget, when served with ketchup or other dipping sauce. See Dreena's note below, for tips on using tofu in this recipe.

Ingredients:

1 1/2 tablespoons rice vinegar or apple cider vinegar (for tofu, use balsamic or red wine vinegar!)
1 1/2 tablespoons tamari (soy sauce)
1 package (8-oz/227-g) tempeh, or 1/2 package (15-oz) extra-firm tofu, patted/pressed dry with paper towels.
3-4 tablespoons cornstarch (or arrowroot, but I found arrowroot to be gummy when fried)
3 tablespoon coconut or olive oil
lemon wedges, for serving (optional, I never add this part)

Directions:

In a large, shallow dish, mix vinegar and tamari. On a cutting board, cut tempeh about 1/2 x 3 1/2-in (1x9-cm) slices. Add tempeh to vinegar-tamari mixture to marinate, turning slices to absorb marinade on both sides. If possible, allow tempeh to marinate for 20 minutes or more in the refrigerator.

In a large dish, spread cornstarch (or arrowroot powder). Dip each tempeh slice in cornstarch, gently tapping to remove any clumps (some areas will have a thicker layer of cornstarch, this is okay.) In a small to medium size non-stick frying pan on high, heat oil. Add tempeh slices and fry on one side for 4-6 minutes until golden brown and crispy. Flip over and cook for 4-5 minutes until crispy, adding more oil if needed. Flip again if needed. Remove and serve immediately with a squeeze of lemon wedge (for adults) or with a favorite dipping sauce...be sure to eat them while still hot.

Note from Dreena: You can substitute tempeh with tofu (I DO!) in this recipe: use 1 pkg (12-oz/350-g) fresh extra-firm tofu, cut into 1/4-1/2 inch thick squares and press between paper towels to remove excess moisture, then marinate it as you would the tempeh (using 2 tbsp Tamari).

This is so good, even my normally "tempeh averse" husband loves it. I originally created the recipe using tofu, which is an excellent variation. Either way, this Tempt-eh! is a little crispy, a little tender, and a whole lot delicious. This appetizer can also be served in an entree with noodles or a whole grain.

Wednesday, October 10, 2012

Golden Vegetable "Halloween" Soup


Halloween is in 21 days. I love holidays. I love being festive. I love Autumn. It gives me a reason to celebrate; something to look forward to when life's work can seem monotonous and repetitive, maybe even hard.

Taking this love of mine, I wanted to find a way to turn it into food. But everything that is festive for Halloween seems to consist of a lot of junk.

I racked my brain. What is Halloween-y-ish? Not a word, I know. But my spell checker doesn't seem to mind.

I shuffled through my big stack of vegan books. Nothing sounded good, or looked like Halloween.

So I resigned myself to just trying out a new dinner. I found a good soup, since Autumn always puts me in a soupy mood.

Forget Halloween. Vegans never have fun anyway, right?


Oh. My. Goodness.

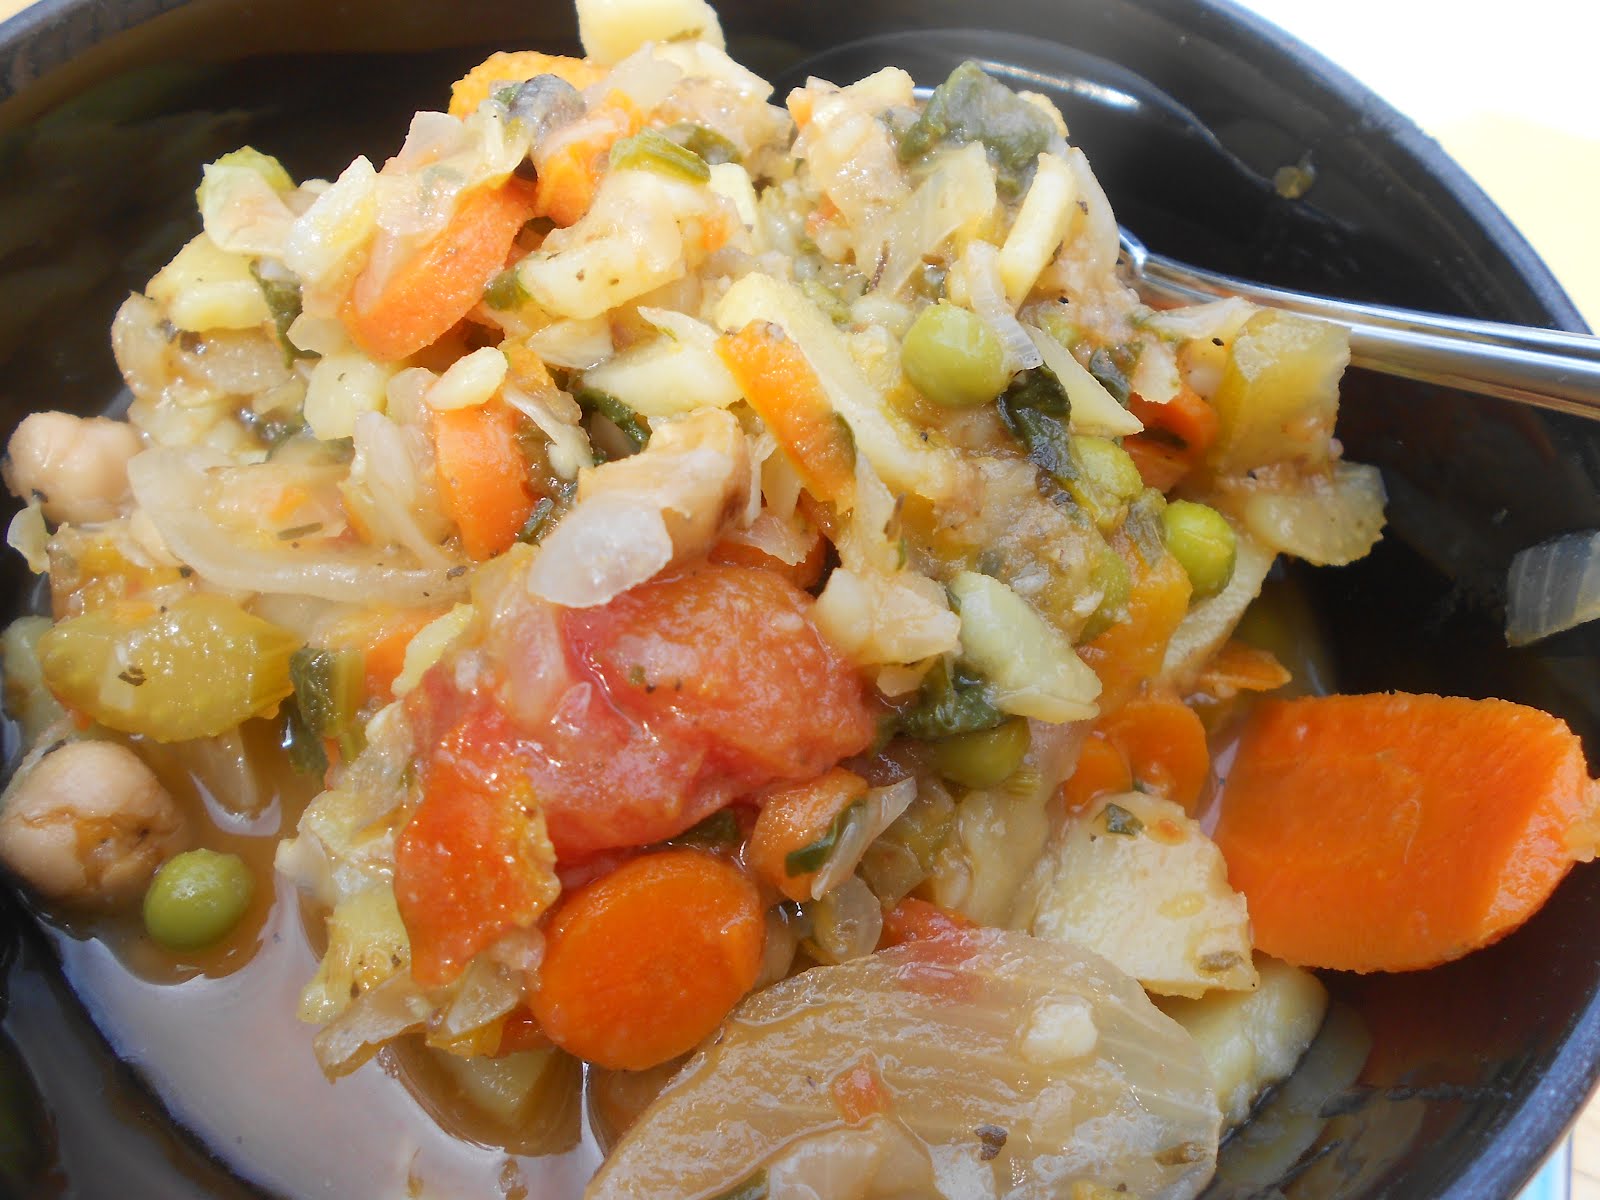
I love this soup/stew/chowder/casserole in a bowl.

More than Coconut Corn Chowder. [Gasp!]

So do my kids...and they generally despise soup. It makes them frown. It makes them sigh. This soup did nothing of the sort. Empty bowls, and Samuel went back for seconds. To keep up with his soup-eating trend, of course Paul had thirds.

This soup was originally called, "Golden Vegetable Soup."

After stuffing my face with it, I realized.

This soup is not only **GOLDEN** my friends.

It is Halloween-y-ish.

Without even realizing it, I had found exactly what I was looking for. The healthy way that I wanted it. Beautiful orange colors, creamy, and yummy. Kid-friendly.

Serve it in black bowls, with a side of fakey little black spiders, and you have Halloween on the table.


I will definitely be making this year-round, even if it is not Halloween, not Autumn, not Fall.

So call it what you may, but I love calling it Halloween Soup. I bet your kids would love that, too.


PROJECT VEGAN KIDS


Golden Vegetable, or Halloween Soup
By Neva Brackett, from Seven Secrets Cookbook
Gluten Free Option, Nut Free, Soy Free

~Makes 12 cups. But in this family, it was gone in less than 24 hours.


Note from Neva: Here's (my daughter) Kathy's favorite soup. She is a busy mother of three, and this is a recipe she developed over time to delight her children (they like the shells) and herself (easy to make). She took it to a soup potluck recently, and was the only one with an empty soup crock to take home.

Note from Ashlee: To make it a little more child-friendly, I omitted the green onions and cilantro. I also added an extra 1/2-3/4 cup of corn to the finished soup. To make it adult-minded, serve with a large green salad. Although this does NOT qualify for VEGAN FAST FOOD, (it took me about 45 minutes) it is Mom-friendly, in that it is not labor intensive, and is quite easy to make.


Ingredients:

1 onion, diced
1 cup shredded or coined carrots (2-3 large) (I coined mine, and added 4 carrots)
2 cups diced potatoes
2 teaspoons salt
4 cups water
2 cups uncooked pasta shells (I used brown rice pasta shells, gluten free)
1 bunch green onions, diced
1 cup frozen corn
1 can coconut milk (or 1 cup raw cashew nuts and 1 1/2 cups water) (I used coconut milk)
10-ounce can tomato soup (to make it GF, may use 15 ounce can tomatoes in juice)
1 tablespoon Chicken-Like Seasoning (I used Better Than Bouillon No Chicken Base)
1/2 teaspoon dried basil
1/2 teaspoon dried dill weed (I found beautiful Dill at Trader Joe's, vibrant green color)
1 bunch cilantro leaves (omit for more child-friendly)

Directions:

1.) Place onion, carrots, potatoes, salt, and water in a soup pot and bring to a boil. Reduce heat and simmer 10 minutes. (I used my electric pressure cooker, on high, for 8 minutes. Carrots take as long to soften as potatoes do.)

2.) Add uncooked pasta shells, diced green onions, and remaining seasonings. Simmer 8-10 more minutes. (Because I used brown rice pasta shells, GF, I had to simmer it for 15 more minutes.)

3.) Blend coconut milk (or cashew nuts), tomato soup, chicken-like seasoning, and corn in a blender until smooth. Add to soup along with cilantro leaves (omit, or serve separately for more kid-friendly verson.) and heat to serving temperature.

Variation: Add 1 cup frozen corn, or 1 cup frozen peas thawed, and added just before serving. (I added corn.)


I know what I am taking to our church Halloween potluck!

Do you have any favorite Halloween/Autumn foods that are healthy?

I love acorn squash. Last night I baked it in the oven, at 400 degrees for 45 minutes. Served it on top of steamed, Jasmine brown rice, with some steamed broccoli. A little salt and pepper, and it was Autumn loveliness.


The kids (7 last night) had pizza topped with Daiya cheese (in block form, then shredded, I think it tastes way better this way, and not so dry as pre-shredded).


These are their very happy pizza faces.


My kids are the only ones who are vegan, and I am happy to report that all of these children enjoyed their pizza. Not knowing it was not dairy cheese. (one child ate three fourths of their pizza, and then complained that it tasted a bit different). You may give it a try with your kids. It doesn't taste exactly like dairy cheese, but if it works, it works!

Tuesday, October 9, 2012

Chocolate Drop Blueberry Pancakes


Smothered in almond butter. Drizzled with maple syrup. Carb comfort food for the weary.

Essie and I have been learning about the brain. Science project. She asked me, on Sunday, to tell her everything I knew about the human brain.

15 minutes later, after ranting off everything I remembered from Anatomy and Physiology classes, I realized, old girl, you've still got it.

And I felt smart again. Something about being a mom makes me forget that I used to use my brain, and not just my heart and hands every day. Essie and her Grandpa were also very impressed. I may has well have been in second grade myself, receiving accolades from an audience.

It piqued our interest, to say the least, and I can tell this project is going to be FUN. One of the most enjoyable reads about the human brain that I have come across recently actually comes from my Blendtec Blender Recipe book.

I always like to imagine that the reason I have lost weight on this diet is because I am finally feeding my body the fuel that it actually burns. Part of my educational brain rant to Essie was about glucose, and I was glad to see my information backed up by this paragraph:

The brain can only metabolize glucose. However, in a very healthy person...when your body experiences a prolonged fast, a rebound hypoglycemic state can occur...When prolonged fasting occurs, adequate amounts of glucose are not available for proper brain metabolism. The brain, seeking glucose for proper metabolism, is then forced to send a signal to the pancreas to secrete insulin, causing a "hypoglycemic state." This "hypoglycemic state" is the brains attempt to force you to eat carbohydrates by causing you to experience incredibly strong sugar cravings, even when you're full...

...If your brain is forced to continue without a proper glucose source, eventually it will begin sending a signal to your body, forcing it to break down and metabolize your own muscle tissue as an alternate glucose source. (p. 7-8, Blendtec Recipe Book 2009.)

So I interpret that to mean: if all I eat is a low-carb diet based on foods completely lacking in complex carbohydrates, my brain will still think it is fasting, even if my stomach is full. I remember how that felt when, by my doctor's instruction, I tried to heal hormone imbalances using a low carb diet.

I never felt satiated. I was constantly in starvation mode, and within a few short months, the best feeling I had was when I quit. And I quit on accident. Like my body just took over because it couldn't take it anymore. I was so starved for something satiating, that the day after one of my sisters' wedding receptions, my brother and I finished off an entire chocolate sheet cake my mom had made. I don't remember feeling so good in a long time.

That sounds crazy. It was crazy.

I shouldn't have to eat an entire chocolate sheet cake to properly feed my brain the glucose it was begging for, after having been deprived of glucose for so many months by trying to subsist on meat, cheese, and heavy cream.

Watching Forks Over Knives, and changing my eating patterns to reflect it's health message, was one of the most liberating experiences I had had in years. Maybe that's why my passion for whole foods is a lil' over the top some days. Because my body is finally happy. I can finally feed it what it has been desperately asking for, and I can feel really good about it. It doesn't have to consist of an entire chocolate sheet cake, either.

It does consist of fruit, vegetables, starch, beans, grains, and more. (NONE of which are allowed on low carb diet. How depressing!) Having my diet consist of these health giving nutrients, I don't get those mad hypoglycemic sugar cravings that seem insatiable, and never-ending. I actually remember trying to get the sugar my body wanted so badly, by raiding the Atkins candy bar section of Wal-Mart. Counting Carbs. Five grams was too high. I am just so glad those days are over!

And now, I am past a year on a plant-based, whole foods diet. Does my body get mad cravings for meat? No. Am I constantly searching for something to satiate me that just isn't there? No.

I can eat a meal, like this, and feel so completely satisfied for hours.


Comforted. Nourished. Happy. Just like this video says carbs can make us happy.


If I follow what Dr. McDougall says, carefully, I have much better days. Waking early is something I look forward to every day now. I can't really sleep past 5:00 a.m. I never used to be able to do that on low carb -- my body felt too heavy and sluggish, and seemed to need longer recovery time. On plant foods, my body recovers quickly and is able to be up and energetic, starting early. Now I love my mornings.

These pancakes are a part of my meal plan to help me take care of the nine children I was talking about. I want to have a little fun, but keep it easy, too.

PROJECT VEGAN KIDS
VEGAN FAST FOOD!


Chocolate Drop Blueberry Pancakes
By Dreena Burton

Modified to be oil free

Note from Ashlee: I already have blueberry spelt pancakes posted, but I found these, and love them even more. I measured the ingredients very carefully, and made a small modification so they could be oil free. I made both the oil version, and my oil free version, and strongly prefer the taste and texture of the oil free version. I used organic, wild frozen blueberries and slathered the finished product with almond butter, then drizzled with maple syrup. These taste good with, or without the chocolate. Kids tend to like the chocolate chip version, and adults like Paul and myself lean toward forgoing the chocolate. I often make enough pancakes for Paul and myself, and then add the chocolate chips to the rest of the batter for the kids.

Ingredients:

1 1/2 cups + 2 tablespoons spelt flour
1 tablespoon baking powder (1 teaspoon for high altitude)
1/2 teaspoon ground cinnamon
1/8 teaspoon (rounded) sea salt
1/3 cup nondairy chocolate chips (optional, but kids love it)
1 to 1 1/2 cups + 1 to 2 tablespoons vanilla nondairy milk (I used original almond milk)
1 tablespoon full fat soy vanilla yogurt (or, if not oil free, use 1 to 1 1/2 tablespoons neutral-flavored oil, or organic extra virgin coconut oil, melted.)
1 cup fresh or frozen blueberries (I used organic, frozen wild blueberries, they are smaller and burst with flavor)

Directions:

Place the flour in a large bowl and sift in the baking powder. Add the cinnamon, salt and chips, if adding, and stir well. In a small bowl combine 1 1/2 cups of the milk with the soy vanilla yogurt (or oil) and stir well.

Add the wet mixture to the dry mixture and stir until just combined. Add the blueberries and gently mix (if using frozen, you can wait to add them just before you are ready to ladle.)

Using the edge of a paper towel, lightly oil a nonstick skillet. On medium-high heat, heat the pan for a few minutes until hot, then lower the heat to medium or medium low and let the pan rest for a minute. (I used a clean, nonstick griddle on medium-high heat, and did not need to oil it.)

Using a ladle, scoop the batter into the pan to form pancakes. Cook for several minutes, until small bubbles form on the outer edge and into the center. Flip the pancakes to lightly brown the other side, 1 to 2 minutes. Repeat until all the batter is used, adding the remaining milk to thin the batter as needed.

If This Apron Could Talk: Begin with 1 1/2 cups of milk and whisk into the batter. At first the batter will be very thin, but give it a few minutes. Later, as you've worked through some of the batter, you'll notice that it might become too thick. So, add the remaining 1 to 2 tablespoons of milk, a little at a time, to thin the mixture, if needed.

If using frozen blueberries, the pancakes will need a little longer to cook, as the batter needs to set up around the cold berries. If needed, lower the heat a little to allow the pancakes to set without over-browning.

Protein Power: Slather your finished pancakes with a layer of cashew or almond butter-or even hemp nut butter. It will become melty with the warmth of the pancakes, and with a drizzle of pure maple syrup--just divine! (I did this with almond butter and maple syrup! Oh, it was so good! And it felt good to eat it, too!)

Monday, October 8, 2012

I'll Meet You Where You Are


It's getting hard to be open again. When I see other posts of mine I feel very vulnerable. I want to close up tight, and go hide in a closet. So that no one can see. Paul read parts of my blog, and although he liked it, he said it was more like a journal than just an informative site. He was surprised how open I was. Which in turn, shook me up a bit.

He says I am very passionate.

And I have these thoughts. Does being passionate come off as childish? Is it wrong to be passionate about life and the things I love? If so, maybe I should turn that part of me off. He says I should channel it, in the right direction. Maybe my blog is not enough of a channel. Maybe the posts cannot contain the "passion" that I have. Time for a long run on a treadmill, then. Or outside.

I am starting to wean Megan. She doesn't like it at all. She cries and cries and asks, "Muh?" Which means, "more?" or, "nurse?" Her little hands, balled up in fists, move back and forth to form the sign language word for, "more?" It is the sweetest plea.


I have never had a child breastfeed for this long. She is just over two years old. Yet she seems to love it, depend on it. I don't know how I am going to do it. Can I stick to it when she repeatedly asks? When she cries until she is utterly exhausted, and can't seem to fall asleep without it? Should I completely reverse course and allow her to breastfeed until she decides she is done? Will that be ever? I do not like having to make decisions like these. The other two kiddos just weaned themselves at one year old, and never really looked back.


Megan is different. She is like me. A very intense child with a lot of emotion that should not be able to come from such a little being. Passionate. I just feel like I can't take it anymore. Her nursing sessions have turned into half hour soothing therapies for her -- torture for me. I hate to see her grow up, but I can't keep pretending she is a baby.

Tomorrow is going to be crazy. I believe I am turning into a childcare. I will have nine children, including my own three, and Alana. Nine. They will all come during different times of the day, and I will probably not have all nine at once. While they are here I plan on being able to get absolutely nothing done. It means I will need to do all of my grocery shopping, cooking, laundry and cleaning today.

Essie and Samuel are so excited; they have been counting down the days. Essie has made a list of all the things she plans on doing with her friends. She will be my helper, as well as the other, older children.

I need to meal plan. Each of these children has specific likes and dislikes. I don't like labeling children, or anybody, as picky.

I simply don't like labels. ADHD. Vegan. Picky. It's a lazy way of making a fast judgement on someone, pigeon-holing them into one category so that we don't really have to get to know that person. Regard them as multi-faceted. A human being.

I like meeting a person where they are, nutritionally, and then encouraging them to take it up a notch. Just one notch. Some people I have met are ready for more and they want radical change. I can't pretend to hide my excitement when I work with these people. They are willing to throw out their entire fridge and pantry, and start over, which is how I started out on this journey.


With kids? I find out their favorite foods. Starting with starch. Do they love rice, potatoes, pasta, pizza, or sandwiches?


And then I find a way to incorporate some protein and fat. Beans? Olives? Tofu? Avocado? Meatless hot dogs?

And lastly, I discover their favorite fruits and vegetables. Pair them up with some dips, sauces, or spreads.


Kids usually start out loving one or two, and I encourage them to branch out and try something new. I have them pick out their own new fruit or veg, and they always surprise me with what they discover. Pomegranates. Snap peas. Pluots. Corn.

I have been guilty of labeling my father-in-law as picky. Last night I took my Vegetable Soup to his home, expecting that only Paul and I would eat it, and the kids would eat the creamy pasta with fried tofu and orange slices.


He surprised me. He ate at least three bowls, telling me it was "good garbage." Yes, this is a compliment! His parents were so glad to have some real, hearty, homemade food. Wow. Genuine gratitude for my hard work in the kitchen. Means a lot to me.

I'm rambling. What I am trying to say is, I like working with any person, exactly where they are at, and helping them discover just how much healthy food they love. Building on it. It's a challenge and an adventure all in one.


What has been a new favorite food that you or your children have discovered on your journey to better health?

Have you ever had to wean a child for your own sanity, even though they don't seem ready?


Saturday, October 6, 2012

Top 5 Tools In My Whole Foods Kitchen

Transitioning to a whole foods, plant-based diet can seem overwhelming. Not only can new foods seem foreign, but also the methods and tools used to prepare them.

Through trial and error I have been able to narrow down my favorite kitchen tools down to 5. Of course, there are always things like juicers, dehydrators, standing mixers, bread makers, etc, but I find those items to be less important.

These are "small" appliances I love.

Top 5 kitchen Tools I use. I wouldn't want to cook without them. I have listed them in their order of importance to me.

1.) A good blender. I recommend either the Vita-Mix or Blendtec blender purchased at Costco. It's cheaper, and Costco has an unbeatable return policy if anything should go wrong. The warranty is also extended. You can return the blender at any time, even if you have lost your receipt.
I personally use the Blendtec Total Blender. I don't get paid to say that. Blendtec doesn't even know about little bitty me. Both blenders do a great job. When I am at my best, healthwise, I use my blender at least 3 times a day. A green smoothie for breakfast, my kids' favorite waffles (made from nuts, seeds, oats, etc, that all require high-powered blending) and some pear syrup. For lunch I eat either a soup (base made in the blender!) or a salad with salad dressing made in the blender. Then I might make my kids some macaroni and "cheese" (cheese sauce made in blender) or a cream from Strawberries and Cream. For dinner a lot of sauces for the main entree require a blender. I have over 2,000 uses on my blender; it keeps track of the number of uses for you. At $400 (I last saw Blendtecs at Costco, including a second, larger jar, for $379.) divided by 2,000 uses, each use cost me about 2 pennies. That cost will continue to go down over the years as I continue to use it.


2.) A good, large, food processor. I have heard Cuisinart brand is the "King" of food processors. I tried the Kitchenaid brand, and was sorely disappointed. Broke the second or third day and it was a bear to clean. Right now the 11 cup food processor is on sale at Costco for $150. I own the 12 cup, but they also have a 14 cup for larger families or bulk cooking. It took me 6 months into whole foods to get myself to buy one. How I wish I had done it sooner. I chop SO. MANY. VEGETABLES! Hummus, Banana Ice Cream, Italian Pizza Cheese, Vegetable Soup, all of these recipes are easier to make with a food processor.


3.) Electric Pressure Cooker. Let me just tell you how lazy I am. I don't wash my potatoes, I certainly don't peel them, and sometimes, I don't even cut them up before cooking. This works best with red and gold potatoes because the skins are delicious. I also DO NOT like waiting 30-45 minutes up here at high altitude for my potatoes to finish cooking. This pressure cooker gets the job done in less than 15 minutes. No peeling, cutting, washing required. It also cooks my dry beans in less than an hour (as opposed to 8-10 hours in a crock pot), I use it to cook all of my soups in about 10-15 minutes, and I use it to "steam" most of my vegetables in 5-10 minutes. Including cauliflower, which normally takes over 30 minutes to cook on the stove top. I LOVE THIS TOOL! Well, I love ALL my tools, but this one holds a special place in my heart. It rewards procrastinators, like myself. Best price? $79 at Costco.


4.) A large Rice Cooker. I live at a very high altitude (over 7,200 feet) and grains are so difficult to cook correctly up here. Other chefs in my area experience the same difficulty. I love how I can cook most any grain, if at the correct setting, perfectly. It's the kind of tool that I can set, and then forget. Leave for a few hours while a grain is cooking, and it will shut itself off. I use the steam cook option to make oatmeal. I also cook millet, and rice of all kinds. The rice is never burned, always tender. Best kind and price at Costco, for $29. Yes, I LOVE Costco. And no, I do NOT get paid to say that.

5.) Nonstick Cookware, high quality. This is my exact set. I bought it on Amazon and haven't looked back. I have been cooking for over 10 years in many kitchens, with many different sets. This set has been my absolute favorite: Analon Advanced Hard Anodized Nonstick 11 piece set. It is metal utensil safe, and the coating inside does NOT get scratched off and end up in your food. It has been my greatest ally in eliminating oils from my cooking. They are also super-easy to clean, and rarely, if ever, burn my food. Not everyone can afford a set like this. That's okay. A good quality nonstick cookware set can be very helpful. Costco sells some pretty good options. And you can return them if you don't like them.


All of this may seem overwhelming. Each item, except for the rice cooker, is not cheap. I did not buy all of these tools at once. It actually took me over a period of two years to purchase. I bought my Blendtec blender about a year before I transitioned to plant-based eating. However, all of these tools have made my life so much easier. They make it practical for me to take on this pattern of eating as a way of life, for the rest of my life.

Feel free to send me an email, or leave a comment if you have any questions about any of these tools. I would love to hear from you.


Friday, October 5, 2012

"Hide The Lentils" Tomato Sauce & Italian Pizza Bread Sticks // Italian Night!


Let me just say, I lost my love for spaghetti a few years ago.

Blame it on store-bought marinara sauce. I have tried SEVERAL different types, and find all of them to be too acidic, and they taste slightly rancid to me.

They all include oils, too much salt, sometimes sugar. Which I REALLY don't like.

Once removing ground beef from spaghetti, the sauce became even less appetizing. I think the fat helped to balance out the acidity. It also doesn't help that without the ground beef, or meatballs, the meal kinda' seems a little out of balance. Not complete.

Which is sad. Spaghetti with Marinara dishes are not only Italian, but have become very much an American food as well. I have thought about how I could revive spaghetti. Plant-based.

Remove the meat -- no brainer.

Then what? Sauce and pasta? Some peas on the side?

Or. Or I could spend an extra hour making bean-based meatless meatballs.

Don't get me wrong, I am not bashing meatless meatballs. My black bean ones are REALLY good. But they take forever. Stresses me out.

SOOOOO. I was so excited when I ran across this recipe in Dreena Burton's cookbook, "Eat, Drink, and Be Vegan!" Called, "Hide The Lentils" Tomato Sauce.

Red lentils. Very good source of plant-based protein, and they don't taste like dirt. Some lentil recipes are known to taste like dirt, I have heard. Of course, I have not yet had that experience in MY kitchen. Just kidding.

Simplicity is beautiful, isn't it?

Chop some garlic. Open some cans. Measure out spices, lentils, agave, and water.

Throw it all together and simmer on the stove for 25 minutes.

This is how it should look when it is done.


To REALLY hide the lentils, I like using my new toy. Immersion blender from Costco.


This is where you get to decide just how chunky or just how smooth you would like to have your sauce. The smoother it is, the less your picky-poos will notice that their sauce has a very healthy ingredient hidden inside.

This sauce is a complete meal when tossed with or poured over a whole grain (quinoa, millet, or brown rice are VERY good options) or some whole grain pasta.


But if you ask my kids, they like using it as a dip for their Italian Pizza Bread Sticks. Made in the bread-maker so that you don't have to. Knead. Rise. Knead. Rise. Not my thing. Bread-makers ARE my thing.


If you are looking for something Gluten Free, look here. I have never tried these before but they look really good. I probably WILL try them someday. They look super-healthy and I like finding alternatives to wheat.

But for now, my kids LOVE (I do that a lot, don't I? Capitalize LOVE!) these bread sticks.

PROJECT VEGAN KIDS


To make this VEGAN FAST FOOD!: Cook whole grain pasta or a fast-cooking grain (quinoa or millet) while the tomato sauce simmers. Instead of bread sticks, serve with toasted, whole grain bread or vegan store-bought bread sticks. While waiting for the sauce to finish cooking, toss some spring mix with cucumbers or broccoli slaw and serve with Ranch Dressing.

We put this all together -- Lentil Tomato Sauce over Millet or Potatoes, Pizza Bread Sticks, and spring mix salad with Ranch Dressing, and had a very enjoyable Italian Night at the Crozier's!

"Hide The Lentils" Tomato (Marinara) Sauce
Modified from Dreena Burton's "Eat, Drink, and Be Vegan!"

Note from Ashlee: If you have guests, or hungry eaters, you may want to double the sauce. We generally use leftovers from dinner for Paul's lunch the next day. This time, there were no leftovers. The sauce is Gluten Free. To make this meal grain free, serve over tender, boiled potatoes with grilled zucchini, chopped or coined, using this method.

Makes 4-5 servings.

Ingredients:

1/4 cup water (for water sauteing, use 1 TBSP olive oil to oil saute)
3-4 large cloves of garlic, peeled and minced
1 teaspoon sea salt
Freshly ground black pepper to taste (I used about 1/2-3/4 teaspoon)
3/4 cup dry red lentils
1 can (28 oz/796-ml) crushed tomatoes (I didn't have crushed, so I used Italian Stewed, diced tomatoes, and just blended them with my immersion blender)
1 1/2 cup water
2 tsp fresh rosemary (or 1 tsp. dried)(If you don't have rosemary, can use 1 tsp oregano)
1 1/2 tsp. dried basil
1 heaping teaspoon dried parsley
1 tsp. agave nectar
1 fresh or dry bay leaf (I didn't have one, and it still turned out great)
1 TBSP red wine vinegar or apple cider vinegar (I used Balsamic Vinegar because Dreena is always saying her kids love Balsamic with tomato sauce, it gave it a deeper, slightly sweet flavor)

Directions:

In a large pot on medium-low heat, add water (or oil), garlic, salt, and pepper. Cover and cook for 4-5 minutes (reduce heat and/or add a few drops more water if needed to prevent garlic from burning).

Rinse lentils. (I always skip this step...I am lazy).

Add lentils, tomatoes, water, rosemary, basil, agave nectar, and bay leaf. Increase heat to high to bring mixture to a boil. Once boiling, reduce heat to medium-low, cover, and cook for 22-25 minutes, stirring occasionally, until lentils are fully softened.

Uncover and simmer for 5 minutes to reduce liquid (do not skip! or it will be too watery!).

Stir in vinegar and season with additional salt, pepper, and/or agave nectar if desired. Remove bay leaf, and serve sauce as is, or puree (I highly recommend doing this!)it with a hand blender to hide the lentils from picky eaters!


Italian Pizza Bread Sticks
by Ashlee Crozier

Note: I basically took our favorite pizza dough, added Italian seasonings, and then shaped them into bread sticks. Brushed them with non dairy butter to prevent them from drying out, and baked it at a lower temperature for 5 minutes longer. You'll want to shape them a little thin, they rise quite a bit in the oven. When dipped with "Hide the Lentils" Tomato Sauce, these are seriously addicting! This dough also can also be shaped into pizzas, after all, that's what it started out as, and we use it at least once a month for our pizzas.


Ingredients:

1 1/2 cups warm water
2 TBSP olive oil
2 tsp. salt
1 tsp. dried basil
2 tsp. dried parsley
1/4 tsp. garlic powder
2 cups unbleached, all purpose flour
2 cups, scantly measured, white whole wheat flour
3 tsp. sugar
2 tsp. yeast

Non-dairy butter, for brushing (optional, you could try to use non-dairy milk, but I haven't tried this, and cannot vouch for the outcome).

Combine all ingredients in your bread-maker, in the order listed. Set the bread-maker to the "Pizza Dough" setting (about 55 minutes) and push start.

Once the dough cycle is complete, remove the dough and cut into 10-15 strips, depending on how big you want your bread sticks to be.

Preheat your oven to 425 degrees.

On a lightly floured, non-stick, or greased surface, roll the strips with your hands, individually, until they resemble bread sticks. Remember that they will rise in the oven, so you may want to roll them just a tad thin.

On a greased baking sheet, or baking sheet lined with parchment paper, spread the bread sticks out at least 2-3 inches apart so they don't bake together.

Using a pastry brush, lightly butter each bread-stick with non-dairy butter (I like Earth Balance Buttery Spread). See picture below for example.

Bake for 15 minutes, or until the edges are slightly golden brown. To bake them faster, you can set the oven to 500 degrees, and bake them for 9-10 minutes. If using the dough to make pizza, it bakes best at 500 degrees for 10 minutes.

Remove from oven and let them cool on baking rack or a cold plate. Dip into your plant-powered, high protein marinara sauce! And Enjoy!


P.S. No matter how carefully I measure, the amount of flour to water ratio needed for the bread maker always differs. The moisture in the air seems to even have an effect! So, I recommend that you watch the pizza dough mixing for the first few minutes. If it looks too wet, sprinkle in some more all purpose flour, a little bit at a time. If too dry and crumbly, add WARM water very slowly and intermittently until the bread forms. It should slightly stick to your finger with the right moistness, but not be so wet that it sticks to the sides of your bread maker and won't knead correctly.


Thursday, October 4, 2012

Nachos With Cheesy Sauce & Veg


Colds tend to hit me pretty hard. Much to my hubby's chagrin, who does not enjoy listening to sniffles, coughing, sneezing, all that stuff.

Mom's just aren't allowed to get sick. Come to think of it, I can only squeeze one childhood memory from my brain when my Mom was sick. She didn't get sick. Or so I thought.

So a little bit of the feminist comes out in me when I see this going on. What happens when Dad gets sick? He can take time off of work, take a nap, watch movies. Kids? Just skip school, sleep in, watch movies, and then when magically feeling better in the afternoon, go jump on the trampoline.

When MOM is sick? Change dirty diapers, do the dishes, call in and take the day off...wait, what? Oh, yeah. This is a job that does not accept sick days, vacation days, or paid holiday.

By the way, what's for dinner?

I have learned to ask for help. I know, novel concept. In the past, I have expected others to just see what is bothering me, feel my pain, give me a break and take over. That's not always how the male mind ticks. Or any mind, for that matter.

I have this thing in my head where, if I have to ask for it, it means he loves me less.

Paul is available. He is willing. You may remember this post and how he completely took over my responsibilities, taking the kids on hikes and more. Sometimes he is not able to do that. Conferences at work, collaborations with people from Germany. Company dinners.

But female pride rears it's ugly head and claims that if he loved me he would read my mind and know exactly what I want, so I would never have to talk. Not one word. Now I don't know WHO to feel sorry for. Me, or him?

Here's another problem. Paul used to cook for me all the time when we were GF/BF. Granted, usually it consisted of opening a few bags, boxes, or cans, but I must say that it was genuinely good food. I loved it. Both the fact that he cooked for me, and the food he made.

When I was pregnant with any three of our kids I would tend to get emo. BAD emo. While I was crying and completely beside myself he would frantically make some food, put it in front of me, and say, "Eat it." And I would respond, between sobs and tears, "But I'm not hungry!"

After consuming everything he had given me, and more, I would then be smiley and cheerful and say, "Oh, I guess I was hungry." Ha! Crazy me.

NOW. But now. We are plant-based. In this marriage, we have decided to take on the mantra, "Divide, and conquer." I am a psycho-control-freak-perfectionist when it comes to MY kitchen, MY food and what my family eats. I take pride in being able to cook for my family, sometimes a little too much pride, and am guilty of not allowing others to help me. I have gotten better at letting Paul do dishes for me...which happens just about every day now.

So when I get sick, he's at a loss. Because of me and my pride, he doesn't know where to start when it comes to plant-based meals. How to make cheese sauce. One of his pre-vegan meals was a cheese melt. Bread, a slice of deli meat, with slice of cheese, heated for 30 seconds in the microwave until cheese melts. Pretty yummy back in the day.

Back to the novel concept of asking for help. I wrestle my pride. Eventually find a way to beat it down long enough to say, "Paul, I need you to help me make dinner." And to my surprise, he responds, "Okay, tell me what to do."

Wow, that was not as hard as it should have been. I was gearing up for an angry fest. Well, switch gears, and just tell the man what to do, Ash.

Chop veggies, using the mini-food processor (my new toy, $30 from Costco).


Heat up a can of refried beans. Set the table.


Little hands can't wait to eat.

Find some juice, and the corn tortilla chips.


And let me make cheese sauce, uninterrupted.


Mom, you don't need to wait to get sick to make an easy dinner. And when you are sick, ask your dear, sweet hubby for a little bitty help. Because he's so willing. Loves you, even if he doesn't read minds. And if I remember correctly, I went and watched a movie right after eating dinner, while he cleaned the kitchen. A little gratitude may be in order; some kindness.


Paul proclaimed, "Mm, this is delicious, I think this is my new favorite meal!"

Because this, is some DELISH VEGAN FAST FOOD!

Kids LOVE it. Have them build their own nachos, so it's exactly the way they want it, and they can take some pride in their work.

PROJECT VEGAN KIDS.


Basic Nachos, You will Need:

Tortilla chips (ours are gluten free, Costco Kirkland Brand)
Cans of refried beans, heated
Optionally, this would also taste great with some Tofu Sour Cream
Chopped veggies, we like:
Olives
Tomatoes
Corn
Avocados sprinkled with pepper
Romaine lettuce
Red onions
Green chile
Bell Peppers


Simple Cheddar Cheese Sauce
From Neva Brackett's, "Seven Secrets Cookbook."

Note From Ashlee: I've had quite a few taste testers try this cheese sauce. Family and friends have all stated that it tastes exactly like the dairy nacho cheese sauce. Or better. It's ALWAYS been gobbled up. Sometimes I have to go back and make a second batch. Amber has incorporated it into her home, and met with great success. Her kids STILL don't know it's dairy free.

If you follow the directions EXACTLY, you will find yourself with a really good cheese sauce. Best for Mexican types of dishes, but also good on kids' pizza.


Ingredients:

1 cup raw cashew nuts
2 cups water
1/2 large or 1 small red bell pepper, or 1/4 cup canned pimentos or roasted red peppers (I ALWAYS use the jarred, roasted red bell peppers, also called pimentos.)
1 1/2 teaspoons salt
2 teaspoons onion powder
2 tablespoons food yeast flakes (nutritional yeast)
1/2 teaspoon garlic powder

Blend smooth (about 2 minutes) and then bring to a boil, stirring until thick. Use for pizza, lasagna, burritos, etc.

Lite Cheese Option: Use only 1/2 cup cashew nuts plus 1 tablespoon cornstarch.

*Makes 3 Cups*


I also use this cheese sauce for:

Cheesy Mexican Casserole
Tamale Pie Casserole