Saturday, July 7, 2012

Super-Charge Me! Cookies and Mighty Tasty Hot Cereal (Oil Free, Wheat Free)


We've had a lot going on around here. My sister and her husband just had their first baby, a girl! Adjusting to a new infant has been work around the clock for them. All of our family and friends have tried and continue to make efforts to try and ease their burden and help with their transition into parenthood.

And, my older brother is getting married next week, WAHOO! I love his fiance and am so excited to have her as my sixth sister! I'll be traveling to Utah to attend his wedding and reception. Afterwards we are heading to Oregon for a conference that my husband is attending.

So I hope to continue blogging over the next few weeks and maybe show a bit about the food we eat on the road. It takes additional effort, but if we try, it is doable and delicious. This is what Dr. McDougall says about eating out (or eating on the road!)


I love what he says about oil! I am so gonna' try that.

(Oh, and BTW, Dr. McDougall has a lot of these videos on his website, I highly recommend you watch these, they are awesome! Just click on the link above and watch the short videos of interest to you.)

Besides having to eat out more because of travel, most of our car snack food will consist of cut carrots and celery (we find that on the road we just want to munch endlessly!) a lot of bananas, grapes, oranges and nectarines, chickpea "tuna" salad sandwiches, and PB&J sandwiches. But part of our car food will also be the Super-Charge Me Cookies by Dreena Burton, made oil free with a minor modification. I LOVE THESE COOKIES!

I have found that the most successful cookies that are made oil free usually have nut butter in them, and other add-ins such as oats, nuts, shredded coconut, chocolate chips and dried fruits (these give crunch and texture, instead of cakey cookies).

This recipe meets all of the above criteria, giving them a nice texture of crunch on the outside and chewy on the inside.

They are also more enjoyable if the original recipe requires only 1 or 2 tablespoons of oil. The less oil the recipe calls for, the better the recipe turns out when I replace it with fruit purees. In this recipe I use applesauce and I love it.

1 Tablespoon of applesauce is only about 17 calories (none of which are from fat) and 1 Tablespoon of oil is 130 calories, all of which are from fat. Oil is also the cause of my oily skin. Sounds ridiculous, but for me, it is true. My skin has been revolutionized by eliminating oil. But more on that, later! (Thank you, Katie, for encouraging me to try to be oil free by asking about skin improvement!!! You totally motivated me!)

I am going to double or maybe even quadruple this recipe and we will eat them on the road. My kids LOVE these cookies also, and that's saying a lot as they usually prefer the cookies made with oil.

Also, I have discovered a new hot cereal that I absolutely LOVE and highly recommend.


It is very easy to make, gluten and oil free, and it tastes so good I think I am in heaven! It will make you feel fabulous and energetic, too! I encourage you to give it a try; four bags of these cost about $11 on Amazon. I am sure places like Sunflower Market and Whole Foods Market will carry it also.


Just a teaspoon or two of brown sugar, some fresh fruit like peaches, bananas or nectarines, some non-dairy milk, and you will have yourself a warm, delicious and energizing quick breakfast.

You will especially enjoy it if you like cream of wheat cereal but want a lighter version, or if you are an oatmeal person. Although I must say that this has quite a bit more texture than oatmeal--the corn gives it a bit of crunch with the creamy taste.

I hope you make and enjoy these easy cookies as much as we do. I also would love to hear if you try the Mighty Tasty Hot Cereal, and what you think of it.

Happy eating!


Super-Charge Me! Cookies
From Dreena Burton's website: www.plantpoweredkitchen.com
Ingredients (11-12 cookies)

1 cup rolled oats or quick oats
2/3 cup spelt flour
1/4 tsp (rounded) sea salt
1/4 – 1/2 tsp cinnamon
1/8 cup unsweetened shredded coconut
1/4 –1/3 cup raisins or chopped dried fruit
3–4 tbsp carob or chocolate chips (optional; or use more dried fruit, nuts, or seeds)
1 tsp baking powder
1/3 cup flax meal (not flax seed)
1/2 cup pure maple syrup (can also sub agave nectar or honey)
3 tbsp almond butter (may use cashew, peanut, hemp seed butter)
1 1/2 tsp pure vanilla extract
1 tbsp applesauce

Instructions

Preheat oven to 350°F (180°C).

In a bowl, combine oats, flour, salt, cinnamon, coconut, raisins, and carob or chocolate chips, sift in baking powder, and stir until well combined.

In a separate bowl, combine flax meal, syrup, almond butter, and vanilla and stir until well combined. Stir in applesauce. Add wet mixture to dry, and stir until just well combined (do not overmix).

Line a baking sheet with parchment paper. Spoon batter onto baking sheet evenly space apart, and lightly flatten. Bake for 13 minutes (no longer, or they will dry out). Remove from oven and let cool on baking sheet for 1 minute (no longer), then transfer to a cooling rack.

Makes 11-12 cookies

Friday, July 6, 2012

Seasoned Lentil and Bulgur "Ground Beef" (Gluten Free Option)


Many people have approached me recently and remarked, “How do you stay so slender?”

My kids and I on our daily run & bike ride.
I am in NO way saying this to be boastful or prideful. I'm actually a bit surprised because it feels like it's nothing really special that I have done by myself. I enjoy a lot of meals that I have been enjoying my whole life, but just with some healthier replacements. My mantra is that you take a food or meal that is healthy, and you create or find replacements to make it healthier, and continue to enjoy those meals. Often physical changes happen so gradually that I don't notice or think about them. I wish I could say, "It's the power of magical food!"

I am saying this, however, because eating plant-based whole foods has some serious side-benefits and people notice.

I’ll be purchasing groceries at the checkout, or casually conversing with a friend, and the questions start coming; from family to friends and strangers alike, they all have similar questions.

In that space of time between the question and my response I realize I have a key opportunity to teach life-saving principles. I have tried many approaches to see which one meets with the most success.

Have you found a well-received response to these types of questions?

Yes, this is my baby, I know we have dramatically different coloring!

Recently a friend stated, “You’re looking great by the way, and it’s not just the skinny, it’s the long hair, and the improved skin, etc.”

My response?

“You know, I have never been able to grow my hair out long before in my whole life. I have been eating a lot of leafy greens and it has completely changed my hair.”

Her response, “So, what, is that like, Folate?”

She immediately wanted to know how she could avoid eating the leafy greens and get the same benefit from an isolated supplement. CRASH, and burn! Another lost opportunity to teach what I have learned to be so completely valuable in my life.

You see, her response is totally legit. It’s normal. No one wants to hear that they are going to have to give up comfort food so they can half-starve as they try to feel some sense of satiation from lettuce leaves and raw carrots. What they don’t understand, and what I have so often failed to properly explain, is just how well and how much I eat with this lifestyle. If those who ask these questions get the idea from me that I only eat salads made from iceberg lettuce and a few thinly sliced carrots with no dressing, they mentally quit before they even physically start.

I definitely CANNOT tell people that I am vegan, or their imaginations conjure up some light, airy crackers that have no substance, and hippies doing dances to save the cows and pigs.

When asked how I stay so slender at the checkout stand, I have crashed and burned again when I respond, “I eat produce, tons and tons of fresh produce.” A look of complete disinterest came over the women's face as she averted her eyes and found something else to discuss with someone else.

And my heart sinks. I did not properly represent what I eat. With this lifestyle I enjoy cookies, pancakes, waffles, smoothies, casseroles, muffins, sandwiches, pizza, burgers, soups, salads, desserts, oatmeal, cereal, ice cream, pasta, mashed potatoes, and on and on and on. Etc, etc, etc! How can I represent these foods in one sentence?

What has been my most successful response?

EAT MORE STARCH.

Thank you, Dr. McDougall, I think I love you!

Recently my most well-received response, met with additional curiosity, desire to change, and understanding:

“Just continue eating what you currently enjoy, and add more starch. Eat MORE rice, beans and legumes, bread, corn, potatoes, pasta, oatmeal, grains, etc. and you will lose weight and feel better. And if you REALLY want to lose weight, throw in some fruit and vegetables on the side.”

People can wrap their head around that, and all of us want to be told that the answer lies in eating more.

So many of us have been told that starches are fattening. What a depressing thought! The most comforting and health-promoting foods in the world have been condemned as evil and unhealthy. I am here to show you with my photos and my personal experience that starch, along with fruits and veggies are the answer. Yet according to many of today's diet gurus we're supposed to feel good and lose weight after eating bacon, butter, steak, and cheese. This creates so much confusion for so many people, including myself before I discovered the power of whole foods.

Even more of us have been told to restrict our portion sizes. Eat less. Go ahead and eat everything you see, just less of it. I am here to state that this is an impossible task. One in which I have never had enough self-discipline to master. It is not a long term feasible plan. The body will fight to get the satiation that it needs to survive, and I am NOT a self-disciplined person.

Still not convinced that starches are what make me thin? Watch this little video from Dr. McDougall's website. My pictures plus this video should tell us something about the power of starch and whole foods!


So, I am here to provide you with a smash-hit recipe. Approved by extended family carnivores. This is not airy, it is not a cracker, nor is it lettuce and thinly sliced carrots. It's substantive, savory, and sensational. It's starch. It's my tried-and-true replacement for ground beef recipes. It's oil free, and if you use it in your recipes to replace the beef, it will help you lose weight.


So far I have used it in Sloppy Joe's and Shepherd's Pie. Each recipe was met with rave reviews, and each one is very simple:

Basic Idea for Shepherd's Pie:

1 and 1/2 to 2 pounds Lentil and Bulgur Ground Beef Replacement (depending on how meaty you like your shepherd's pie)
(an optional sauteed onion)
2 cans of Campbell's condensed tomato soup (Yes, it's vegan!)
4-6 cups steamed vegetable (carrots, broccoli and peas work best, or a combo)
1 large batch of your favorite home-made mashed potatoes (preferably oil free and seasoned well with salt and pepper)

Stir to thoroughly combine one pound ground beef replacement with optional sauteed onion and 2 cans condensed tomato soup. Layer in oven safe dish starting with "meat" and soup mixture, then veggies, then mashed potatoes and heat through in the oven. (About 350 degrees for 15-20 minutes).

For the Sloppy Joe's:

3/4 to 1 pound Lentil and Bulgur Ground Beef Replacement
1 can of Hunt's Manwich Thick and Chunky Sloppy Joe Sauce
1/2 of a medium onion, sauteed
1 can black beans, drained, rinsed, and lightly smashed with a fork or pastry blender (OPTIONAL)
1/2 red bell pepper, chopped
1/4- 1/2 cup ketchup
Salt, pepper, and onion powder to taste

Mix all of the ingredients together in a skillet on the stove-top and heat through. Simply slap it on down onto a hamburger bun with some lettuce or spinach and some ketchup and you have a manly man's Sloppy Joe.

I am not sure how the recipe works for beef recipes that do not call for tomato sauce added to the beef. I will have to try that out. If you would like me to, I could try to post specific recipes using the ground beef replacement. There were rave reviews by my omnivorous extended family members about how good the Shepherd's Pie and Sloppy Joe's were, and I am fairly confident you will enjoy it in those two dishes.


Seasoned Lentil and Bulgur "Ground Beef" Replacement
(Tweaked from two recipes: Nofu Love Loaf from Dreena Burton's "Let Them Eat Vegan," and tweaked spice combination from Neva Brackett's, "Seven Secrets.")

Ingredients:

1 cup brown (green) lentils, rinsed
2 cups vegan vegetable stock
2/3 cup water
2-3 bay leaves
3/4 cup bulgur (use GF-certified steel-cut oats for gluten-free version)
1 cup water, boiled
1/2 teaspoon oregano
1/2 teaspoon basil
1 tablespoon (rounded) beef-like seasoning (I used Superior Touch Better Than Bouillion Vegetable Base, pictured above)
2 teaspoons onion powder
1 and 1/2 teaspoons salt
1/2 teaspoon garlic powder

Instructions for stovetop:

Combine the lentils, vegetable stock, 2/3 cup of water, and bay leaves in a saucepan. Bring to a boil, then lower heat to medium-low, cover, and cook for 25 to 30 minutes, until just about tender. Once done, add the bulgur, seasonings, and boiling water, cover, and cook on medium-low heat for another 8 to 9 minutes.

Once the bulgur is cooked, remove the bay leaves and stir very well. Transfer the mixture to a large skillet or baking dish to layer for Shepherd's pie (with the tomato soup added) or mix with Hunt's Manwich Thick and Chunky Sloppy Joe Sauce as directed for Sloppy Joe's. Also freezes wonderfully in a freezer gallon Ziploc baggie for later use.

Instructions for Pressure Cooker: (my preferred method, makes the lentils and bulgur perfectly cooked and seasoned, my pressure cooker is electric.)

Combine the lentils, vegetable stock, 2/3 cup of water, and bay leaves in a pressure cooker. Cover and cook on high pressure for 10 minutes. Once done, add the bulgur, seasonings, and boiling water, cover, and pressure cook on high for another 6 to 7 minutes.

Once the bulgur is cooked, remove the bay leaves and stir very well. Transfer the mixture to a large skillet or baking dish to layer for Shepherd's pie (with the tomato soup added) or mix with Hunt's Manwich Thick and Chunky Sloppy Joe Sauce as directed for Sloppy Joe's. Also freezes wonderfully in a freezer gallon Ziploc baggie for later use.

Enjoy!


Saturday, June 16, 2012

Chickpea "Tuna" Salad, Or Sandwiches, Oil Free!


I know I have talked about un-tuna sandwiches before, however, I didn't really provide a recipe, and the options were not oil free. Since going oil free, I have found this recipe, and it is the best. Thanks to Dreena Burton, as usual!

It's also a good replacement for that old chicken salad sandwich...

And this is another lunch recipe that can be a sandwich for your kids, and then made into an excellent salad for yourself, just by putting it onto a bed of chopped greens such as spinach, spring mix, kale, etc.


It's a really good recipe to have on hand for those times when you only have a few minutes to make a meal. I am always looking for quick and easy, and this meets that criteria. And it doesn't hurt that it is WAY healthy and delicious!

We always like adding chopped red grapes to our un-tuna salad sandwiches. Makes it just a tad sweeter and kid-friendly. This recipe is "two thumbs up" according to my husband and children, and myself! We love it!

Chickpea Salad

Ingredients (2-4 servings)
By Dreena Burton, from www.plantpoweredkitchen.com

4 teaspoons tahini
2 teaspoons plain nondairy milk
2 teaspoons freshly squeezed lemon juice
1 1/2 teaspoons red wine vinegar
1 teaspoon tamari
1/2 teaspoon dijon mustard
1/2 teaspoon kelp granules (we didn't have this, and it tastes great without it!)
1/4–1/2 teaspoon pure maple syrup
pinch or two sea salt (or to taste)
freshly ground black pepper, to taste (optional)
1 cup cooked chickpeas, rinsed and drained, and semi-smashed (see below)
1/4 cup diced celery
1/4 cup diced apple
1/4 cup diced red grapes
2–4 tablespoons diced green or red bell pepper or cucumbers (optional)
1–2 tablespoons chopped fresh parsley (optional)

For Serving:

swiss chard leaves (for rolling), or
chopped greens, or
whole-grain tortillas, or
sliced bread

Instructions:

In a bowl, whisk/stir together the tahini with the milk, lemon juice, red wine vinegar, tamari, mustard, kelp granules, maple syrup, salt, and pepper. Mash/smash the chickpeas just slightly with the bottom of your measuring cup, and then stir in with mixture along with celery, apple, bell pepper, and parsley, if using. Stir through until well mixed.

Refrigerate in an airtight container until ready to use. To serve, place several tablespoons of mixture in a full large chard leaf and roll, creating a raw ‘burrito’ or ‘sushi’. Repeat until mixture is used. Optionally, spread mixture between sliced bread for sandwiches, use as a dressing on a bed of chopped greens, or rolled in a whole-grain tortilla.

Friday, June 15, 2012

Cheesy Mexican Casserole


Corn and Bean Tortilla Lasagna with Avocado and Home-made Cheddar Cashew Cream sauce.

Can I just call this Mexican Casserole? Good. Much simpler.

And if you haven't seen my post on DELICIOUS Italian Lasagna, check it out! Sure to please the whole family with a one dish wonder.

And, speaking of one dish wonders. Have you ever noticed that plant based world is a LITTLE short on casseroles?

I am a casserole lover. This Cheesy Mexican Casserole totally meets my needs. Especially because it is oil free when made with my homemade cheddar cashew cheese!


My most recent passion has been to figure out how to create more casseroles that are super family friendly. I've got some pretty good ideas stewin' around in my brain.

Not only is this casserole very family friendly, it is very fast and easy. I don't think I have ever made a casserole this fast and easy. Whether it was plant based or not!

The basic idea is that you take cooked pinto beans (homemade in your crock pot or pressure cooker, or store-bought in a can) and mix them with tomato sauce and spices.


I am sorry my beans are not very pretty. Whatever, right? I'm a mom and I only have like 3 seconds to take pictures of stuff before I throw it together and children and hubby gobble it up.


I am realizing just now that I bought practically all the ingredients for this recipe at Costco (they sell avocadoes, frozen corn, dry pinto beans, onions, limes, white corn tortillas, tortilla chips, tomato sauce, spices, etc) No need for a fancy shmancy specialty store here. You could also get all the ingredients at Wal-Mart.


Layer it in a casserole dish: 1) Bean, tomato and spice mixture, 2) tortillas and 3) sliced avocado, black salt, lime juice, and frozen or fresh corn kernals.

Repeat.

Except this time instead of avocado and corn kernels, top it with crushed tortilla chips and homemade cheddar cashew cheese sauce.


Okay, my mouth is watering. I love this dish!

My family hates Daiya cheese. SORRY DAIYA! I know it is so popular in the vegan community. But for some reason, none of us like it. So when I set out to make this recipe I knew that it would fail if I used store-bought fake cheesy. In comes homemade cashew cheddar cheese. The trick with this stuff? Don't use too much.

Notice I didn't completely douse and drown the tortilla chips in cheese. They are not all covered. It tastes better this way! This sauce is really thick and should not be over-used.


Cheesy Mexican Lasagna
Modified from Dreena Burton's "Eat Drink & Be Vegan"

Ingredients:

1 can (14-ounce) tomato sauce
1 tsp chili powder
1 1/4 tsp cumin powder
1 tsp dried oregano
1/8 tsp allspice
1/4 tsp (rounded) sea salt
Freshly ground black pepper to taste
1/2 tsp chipotle hot sauce (I used Tabasco brand)
1/4 tsp agave nectar
2 medium cloves garlic, finely minced or pressed
1/3 cup onion, diced
1 can (14-ounce) pinto or black beans, rinsed and drained, about 1 3/4 cups)
6-8 (6-inch) corn tortillas
1-2 large avocado, thinly sliced
1/2 tsp sea salt (I use black salt from Amazon.com)
3/4 cup frozen or fresh corn kernels
1 1/2 tbsp fresh lime juice (about 1 lime)
1/2 cup tortilla chips, crushed (I ended up using about 1 and 1/2 cups)
3/4 cup vegan cheese, grated (optional)
OR 1 recipe Cheddar Cashew Cream Sauce (recipe below)
1/4 cilantro leaves, chopped (for finishing, I omitted; for kid-friendly version)
Fresh lime wedges (for garnish, a must!)

Cheddar Cashew Cream Sauce:

I used to make this cheese with twice the amount of roasted red bell peppers (pimentos) but the taste was too overpowering. I found that reducing the amount of pimentos by half produced a much more appetizing cheese sauce.

Ingredients:

1 cup raw cashews
2 cups water
1/4 cup pimentos (roasted red bell peppers) measured carefully
1 1/2 teaspoons salt
2 teaspoons onion powder
2 tablespoons food yeast flakes (nutritional yeast)
1/2 teaspoon garlic powder

Instructions for cheese:

Blend smooth (about 2 minutes) and then bring to a boil in a saucepan on the stove, stirring until thick. Use for pizza, casseroles, lasagna, burritos, etc. Because you are only lightly covering your Mexican casserole with this cheese, you will have leftovers. I recommend pouring these leftovers into a gallon freezer ziploc baggie and immediately freezing it. It thaws quickly if placed in hot water in the sink for future cheesy uses.

Lite cheese option (lower fat): Use only 1/2 cup cashew nuts plus 1 tablespoon cornstarch.

Instructions for Casserole:

1.) Preheat oven to 400 degrees. In a large bowl, combine tomato sauce, chili powder, cumin, oregano, allspice, 1/4 tsp salt, pepper, hot sauce, agave nectar, garlic, onion, beans, and stir to mix well.

2.) Lightly oil or spray a 9X13 baking dish with cooking spray. Pour half of mixture in baking dish and tip back and forth to distribute evenly.

3.) Place half of tortillas on top of mixture (use 2 whole tortillas and cut a third and fourth to cover spots; or cut them all into strips).

4.) Place avocado slices on top of tortillas and season with salt. Distribute corn kernels (no need to thaw if using frozen) over avocado, then drizzle with lime juice.

5.) Top this layer with remaining tortillas, spread with remaining sauce, and sprinkle with crushed tortilla chips, then cheese. If using cashew cream sauce, use baster or pastry bag to distribute evenly a light layer of sauce.

6.) Cover with aluminum foil and bake for 20 minutes, then uncover and bake another 7-10 minutes, until cheese is melted and casserole is bubbling at edges. If cheese hasn't melted, broil for 1-2 minutes. (Of course since the cashew cheddar cheese is already in liquid form, it is not going to melt. However, it will get slightly browned and perhaps crisp at the edges when it is done.)

7.) Remove from oven and cut into squares. Sprinkle with cilantro and serve with lime wedges.


Tips for serving: I served this with Spring Mix and chopped Zucchini salad topped with Fresh Raspberry Pecan Vinaigrette. It made a great pair! And if you are crazy like me and love your steamed veggies, some lightly steamed broccoli or green beans sprinkled with salt and pepper would go great with this. Or, you can try lightly spreading your steamed broccoli with hot leftover Cheddar Cashew Cheese Sauce.

Eat up, and Enjoy!!!


Thursday, June 14, 2012

Fresh Raspberry Pecan Vinaigrette (oil free!)


Okay. So every time I eat this I feel guilty. I'm messed up. If something tastes super-delicious, no matter how healthy it is, I feel guilty for eating it. Believe me, going plant-based has helped me with this issue. Life tastes super-good and I don't need to feel guilty about it.

But you will see what I mean when you eat this. You'll have to stop yourself and ask, "Am I really eating salad? Or is this sweet jam?"

This dressing makes a simple spring mix salad taste like I am eating dessert for my salad. Aaaah, dessert. Sounds yummy.


I just halved and coined some organic zucchini (this dressing also would work with vegetables like cucumbers and avocado) and tossed it with organic spring mix from Costco. Easiest salad to make EVER. I mean, E.V.E.R.

It's oil free. EASY.

I hope you love it!

In my area the cheapest place to purchase fresh raspberries and raw pecans is at Costco.

Here's how you toast pecans:


Ingredients:

1.) 1/2 cup pecans
2.) Oh, wait, there's only one ingredient!

Instructions:

Heat oven to 350. Place pecans in an oven-safe dish or pie plate. Toast in oven for 5-7 minutes or until fragrant. And watch them like a hawk! They burn so fast and easily!


Raspberry Pecan Vinaigrette
Modified from Dreena Burton's Let Them Eat Vegan! (I know, I am obsessed!)

I simply omitted the oil, and replaced it with twice the amount of water to make it oil free. The raspberries and gently pulsed pecans make this dressing more than thick enough to skip the oil.

Ingredients:

1 1/2 cup fresh raspberries
1/2 to 1 tablespoon red wine vinegar (I used 1/2)
1/4 to 1/2 teaspoon Dijon mustard
1/2 teaspoon sea salt
2 1/2 to 3 tablespoons pure maple syrup or agave nectar
Freshly ground black pepper
6 tablespoons, or 1/3 cup filtered cold water (or 3 tablespoons walnut oil if you like oil)
1/2 cup toasted pecans
Additional water (1-2 tablespoons?) to thin if desired (optional, I didn't add)

Instructions:

Using a standing blender or an immersion blender and deep cup or jar, puree all the ingredients, except the pecans and optional water, and blend until fully smooth and creamy.

Add the pecans, and pulse until well incorporated but still maintaining some texture. Add water to thin, if desired.

Pour over spring mix or spinach, with chopped, raspberry complimentary veggies such as cucumbers, zucchini, and/or avocado.

Note from Dreena: If you do not like having seeds in your vinaigrette, strain through a fine sieve after blending. If using a high powered blender, it pulverizes the seeds quite well, leaving not too many nibbly seeds noticeable. But straining is still an option. Simply strain the vinaigrette, return to the blender, and then pulse the pecans into the mixture.


Wednesday, June 13, 2012

Artichoke Spinach Lasagna & Italian Pizza "Cheese"


This was a family favorite, pre-vegan days.

I LOVE taking old vegetarian recipes and making them vegan.

A sister of mine once asked, "Are you SURE?? There is no meat in here?"

Yes, I am sure. And now it has no cheese, no dairy, and no oil.

All of my children gobble this up. Including my little picky Essie. This is one of her absolute favorite dishes.

And, have you had your salad today? Something I am learning with this salad-a-day challenge is that if I don't have my salad for lunch, before I eat my main cooked dish, I have little chance of getting in my salad for the day.

I have now missed two days of eating salad since starting on May 27. Each of those days I waited until after I had eaten a big, late lunch to panic about eating my salad. And each of those times I have been outside my own home -- unable to do anything about it. So, I am learning. Eat salad. Eat it early, and eat it first.

What have you learned about yourself with this salad challenge? I am interested to know.

And, on to the HOW of my favorite plant based lasagna.

Artichokes, onions, and spinach sauteed (in water) with Italian spices (including red pepper flakes) make up the meat replacement.


Mashed potatoes replace the cheese.

I know, it seems like there is no way it would ever work. But it does. Somehow it picks up the flavors, blends well, and adds smooth creaminess that can compete with dairy cheese.


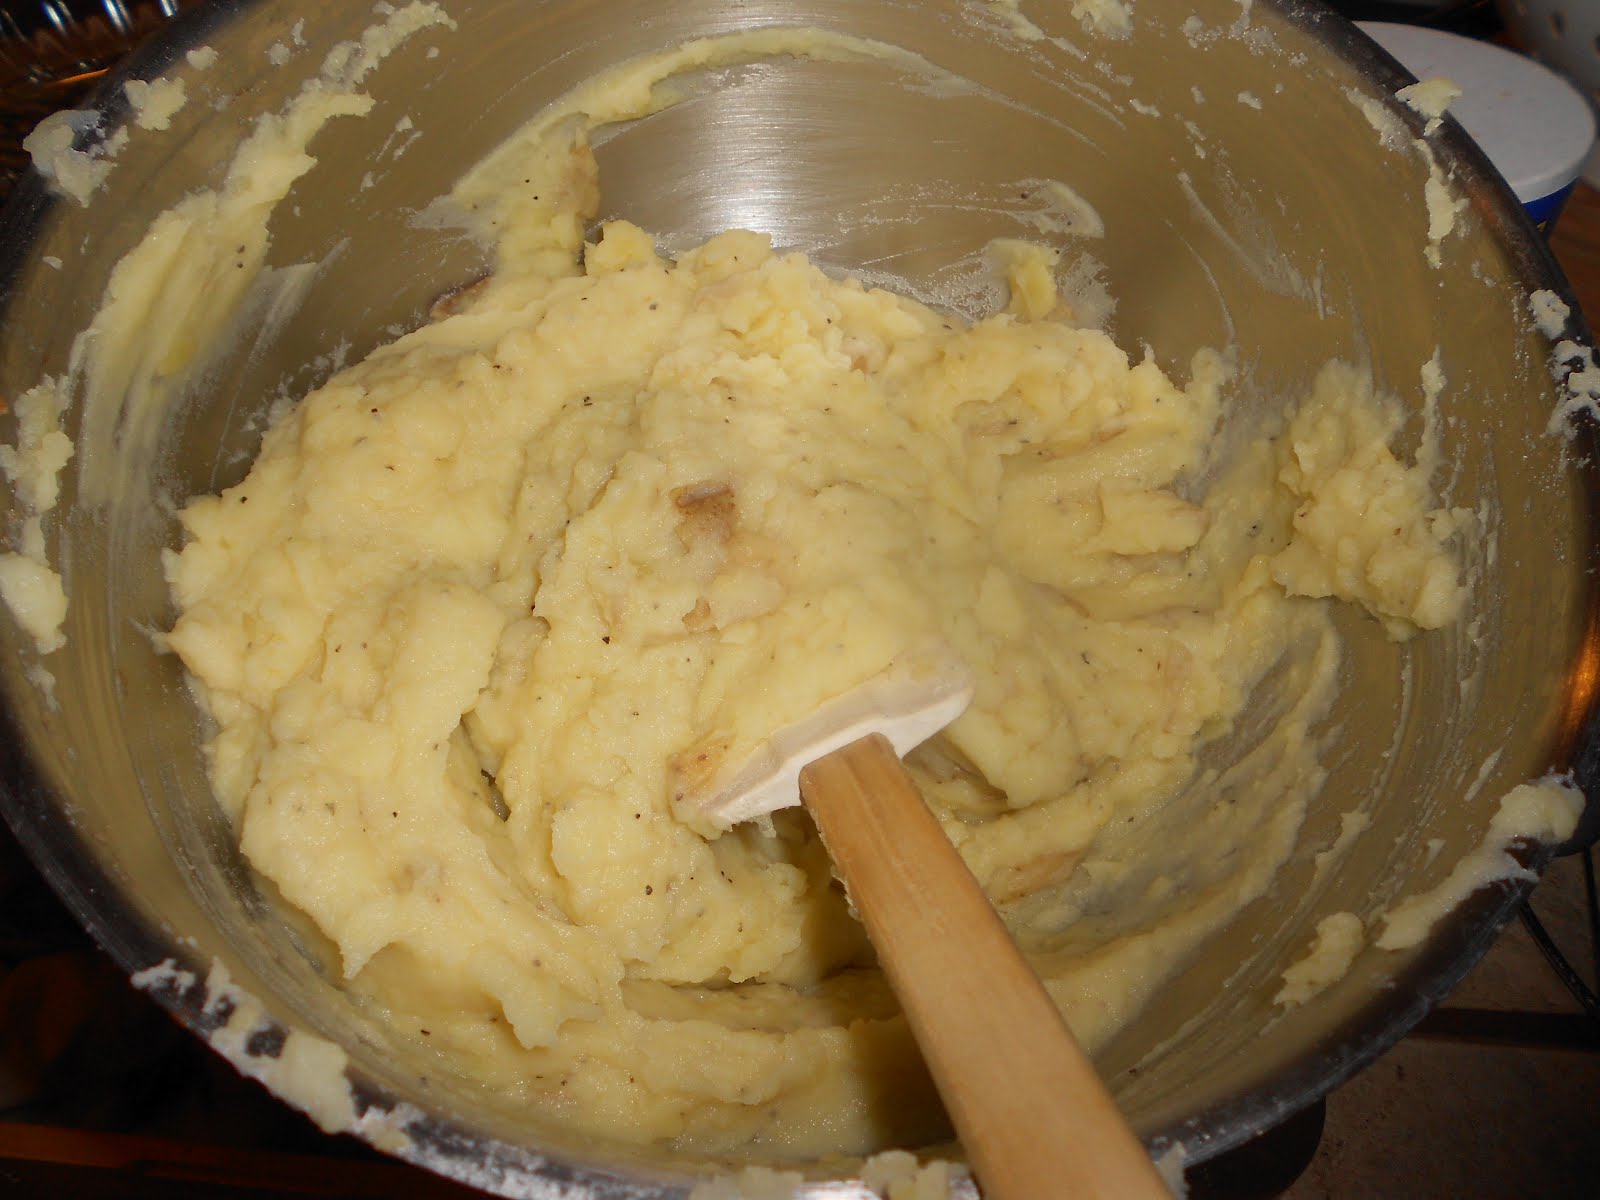
The trick is, the potatoes have got to be really smooth and creamy. How do you get them that way? Cook them in boiling hot water until they fall apart when jabbed with a fork. Strain them immediately, they should be piping hot. AND, most importantly, RESERVE THE HOT POTATO WATER. See how hot this is? Steam coming off while it is being mashed.


Don't add anything to the potatoes until all the lumps are gone. Then, add some hot potato water, and then some soy or coconut milk to make it creamy. Add salt and pepper to taste, and VOILA! Fabulous mashed potatoes. If you add water or milk before the lumps have all been mashed out, you will get lumps in your mashed potatoes.

And if you just can't get past the idea of using mashed potatoes, you can use PIZZA CHEESE! (See below for recipe.)

This stuff is so good. It works well as a dip with crackers or bread, OR a great stuffing for a spinach Calzone.

For this lasagna recipe, I personally strongly prefer to use the mashed potatoes as they are lighter and the textures blend a little better. But use what sounds good to you. Or, if you really just can't make up your mind, you could make this recipe with the mashed potatoes AND the pizza cheese. I have done it before, you just need to increase the baking time by about 10 minutes.


Even if you don't make this as your cheese for the lasagna, I recommend you try it some time. Especially in a spinach calzone. YUMMY! Or even just as a dip.


Layer your ingredients: Marinara sauce, a third of the artichoke and spinach mixture, no-boil lasagna noodles (either white or brown rice noodles), and a third of the creamy mashed potatoes (or pizza cheese). Repeat layers again, until ingredients are used up, ending with spinach and artichoke mixture.


Cover with foil and bake in the oven at 400 degrees for 40 minutes. Then remove foil and bake an additional 15 minutes.


Artichoke Spinach Lasagna
By Ashlee Crozier (with a little help from Allrecipes.com)

INGREDIENTS:

1 package uncooked, "no-boil" lasagna noodles
1/4 cup water
1 onion, chopped
4 cloves garlic, chopped
1 (14.5 ounce) can vegetable broth
1 and 1/2 teaspoons dried basil
2 teaspoons dried oregano
1/4 to 1/2 teaspoon red pepper flakes (depending on how hot you like it)
1 (14 ounce) can marinated artichoke hearts, drained and chopped
10-16 ounce bag or box of frozen, coarsely chopped spinach
1 (28 ounce) jar tomato pasta sauce (marinara)
3-4 cups creamy mashed potatoes, or 2 cups pizza cheese, divided

DIRECTIONS:

1. Preheat oven to 375 degrees F. Spray a 9x13 inch baking dish with cooking spray.

2. Heat a large cooking skillet to medium-high heat. Saute onion and garlic for 3 minutes in 1/4 cup water, or until onion is tender-crisp. Stir in broth and seasonings; bring to a boil. Stir in artichoke hearts and spinach; reduce heat, cover and simmer 5 minutes.

3. Spread 1/3 of the artichoke mixture in the bottom of the prepared baking dish; and layer a third of the marinara sauce over top of it. Top with 4 or more cooked noodles. Spread 1/3 of the mashed potatoes over the noodles. Don't worry if it gets a little messy and the layers start mixing together. Just do your best to make sure the noodles are completely covered with the wet ingredients so that they cook properly. Repeat layers 2 more times, ending with marinara sauce and artichoke mixture.

4. Bake, covered, for 40 minutes. Uncover, and bake 15 minutes more, or until hot and bubbly. Let stand 10 minutes before cutting.

Serve, and Enjoy! I hope you love!


Sun-Dried Tomato & Basil “Cheese” (AKA Italian “Pizza Cheese”)

1 cup raw cashews, soaked for two hours or more
Juice of one lemon
¼ tsp salt
½ tsp white miso (optional)
4 sundried tomatoes, chopped
¼ cup basil

Throw nuts in a food processor and process the heck out of them! Then add salt, lemon juice and miso (if you’re using it). Scrape the sides of bowl and run your processor again, this time drizzling some water in. Keep doing this until the cheese reaches the consistency you like. Think "ricotta-texture." Then throw in your chopped sundried tomatoes and fresh basil and pulse to incorporate. Scrape into a bowl for dipping, spread into a spinach calzone, or layer it into Artichoke Spinach Lasagna.


Monday, June 11, 2012

Strawberry Ice Cream


I can remember the last time I ate McDonald's ice cream fudge sundae about a year ago, pre-vegan days. Tasted pretty good. The next morning I felt like I had been hit by a bus.

I felt so horrible, I slept as long as I could, but it was Sunday and I had to get myself and my three kids ready for church. I can remember barely being able to wash my face and throw on a dress as I walked through what seemed to be a cloudy haze. It was like a milk hangover. Yuck. I spent all of church in a sick stupor and for the few minutes that Paul could sit by me (he's in the bishopric) I lay my head on his shoulder and whined as I tried to recover with my eyes closed.

I vowed to myself that I would never eat McDonald's ice cream again. It took until about 3:00 in the afternoon to finally recover, and I haven't touched dairy ice cream since.

More than 50% of adults are actually allergic to milk, or lactose intolerant, according to Dr. John Mcdougall. I believe him. Especially today's milk that is filled with antibiotics, growth hormones, and plenty of junk. A lot of it is cross-contaminated from the filthy conditions in which cows are raised.

So, we make non-dairy ice cream. No cows or people are injured or abused in the process.

I think I ate like 3/4 cup (I blame Paul, he served me up!) of this ice cream last night. Afterwards, and this morning, I felt great. No dairy hangover with this stuff!


Making non-dairy ice cream is a breeze!

And kids love helping out.

After you have gathered all of your ingredients, (nuts, coconut milk, guar gum, sea salt, strawberries, vanilla or vanilla bean, non-dairy milk, maple syrup and granulated sugar)


Blend it all up in the blender. The first time I made this, it tasted a little too coconutty-ish. I added extra strawberries and granulated sugar the second time (didn't have the vanilla bean, I am sure this also enhances vanilla flavor more) and it tasted so good! I will show those modifications in the recipe below.


And grab your frozen ice cream bowl. Try to leave it in your freezer until you have everything set up and ready so it doesn't thaw.


Maybe freezing your ice cream bowl should be step 1? When I first bought my ice cream maker I didn't know I was supposed to freeze the bowl so I poured in all the ingredients and kept wondering "Why isn't the mixture getting cold and thickening?" Ha ha. LOL. The manual says to put the bowl in your freezer for 6-22 hours to get it frozen. I keep mine clean and in the freezer at all times (manual also suggests doing this) so that we can make ice cream whenever we get the hankerin'.

Then turn your assembled ice cream maker on and immediately pour in your blended ingredients. I use the cuisinart ice cream maker because it does not require that I buy or make separate ice, but you will need to follow the directions for whatever specific ice cream maker you purchase.


After about 20 minutes the mixture should start to thicken. Turn off your ice cream maker when the cream reaches soft-serve consistency. If you go any longer than this, the mixture will actually start melting.


At this point you can serve and enjoy, or pour into a freezer-safe container, and freeze a little longer.


It freezes beautifully!

We always freeze ours because the colder it is, the better it tastes. It takes about 3-4 hours to set in the freezer. And when we use our ice cream scoop it always comes out looking like the ice cream it was meant to be! Thick and creamy, sweet and refreshing. Dare I even say energizing?!?


My kids and I used this basic recipe to make mint chocolate chip ice cream. Instead of strawberries we used 2 cups tightly packed spinach (makes it green and I promise you can't taste the spinach!!) with 1/2 to 1 teaspoon pure mint extract and some finely chopped non-dairy chocolate chips. Fabulous! Let me know if you want that exact recipe posted, too.

Strawberries 'n' Cream Ice Cream
Adapted from Dreena Burton's Let Them Eat Vegan!

1 and 1/2 cups fresh strawberries (or frozen) (I suggest coarsely cutting the strawberries so that you can fit more in your measuring cup)
1 (14-ounce) can coconut milk (not light)
1/2 cup raw cashews (macadamia nuts are also great!)
1/2 cup plain or vanilla non-dairy milk
1/2 cup pure maple syrup or agave nectar
1/4 cup granulated white sugar (optional, but I recommend)
1/8 teaspoon sea salt
1/4 teaspoon (rounded) guar gum
Seeds from 1 vanilla bean (I used 1/2 to 1 teaspoon vanilla extract, but I am sure it tastes fantastic with vanilla bean!)

In a blender (I use Blendtec), combine all the ingredients and puree until smooth, scraping down the sides of the blender as needed (this may take a few minutes with a standard blender). Transfer the mixture to an ice-cream maker (follow the directions of the specific model), and churn until the mixture is of soft-serve consistency. Transfer to a container to store in the freezer, and freeze until serving.

Dreena suggests making a batch of brownies ahead of time and cutting them into small cubes. Add to the ice cream the last few seconds of churning for a special treat.


Wednesday, June 6, 2012

Orange Blaster & Working with Curly Kale


I tried a new green smoothie...and loved it!!

I have been stuck on Sour Mango + Spinach smoothie and slight variations of it.

My kids even like this green smoothie. And I hope that you do, too.

Because the foundation of this Orange Blaster green smoothie is Curly Kale, and because I keep talking about chopped kale salads in June Salad-a-day challenge month, I thought I would do an informational post on working with kale.

Enjoying kale in green smoothies, like this Orange Blaster, is a great way to get started and get hooked.


It seems that there are really only two types of people when it comes to kale. Those who love it and use it every day, and those who know nothing about it at all. A year ago I was in the previous camp: I knew absolutely NOTHING about kale -- in fact, I didn't even know it existed. I wished that somebody out there would have written about how to work with it, because this stuff isn't second nature for most people.

After learning about it, eating it, and loving it, my new motto is: "Kale -- when Spinach isn't green enough."

But really, after eating greens for so long, you start wanting just a tad stronger of a green kick than before. Is that the definition of addiction? You keep needing a stronger hit??? Eeek. ANYWAY!

Step 1: Choose the right kale.


I show you this sticker because you can make sure the produce you are buying is organic by checking it's number code. If it begins with the number 9, it is organic.

If you are going to love kale, you have GOT TO BUY IT ORGANIC AND FRESH! So no discolored brown or yellow leaves. The only place I am happy with buying my kale is at Whole Foods Market, or at a local organic farmer's market.

I tried other kale from Sunflower, etc, that was not organic, and it was pretty rubbery and just downright yucky. Trust me on this one.

Step 2: Wash your kale.


Unless you like eating bugs and dirt.

There are always little tiny bugs in the bath water left behind from washing my kale in the kitchen sink. Yes, you are eating foods from the earth. Wash it. I let it soak, and then rub two kale leaves together to create the friction to get it clean. Then I plunge and shake the kale under water. Rinse and let dry in my colander. Gets'em pretty clean.

Step 3: Remove the kale leaves from the inedible, thick stalk.

Aaah I love this step. Happy sigh. It's pretty fun. Yes, I love my kale.

Start at the base of the kale. Using your right hand, grip the base of the stalk firmly.


With your left hand, pinch the stalk and in a quick motion, pull downward while keeping your forefinger and thumb pinched tightly around the stalk.


Almost there!


You should have a bunch of kale leaves, and a bunch of useless stalks. They've served their purpose... your leaves will have a tiny bit of stalk attached at the top but that is okay because they are small and edible.


At this point you can throw your kale leaves into the blender, or put it on a cutting board and chop it up for a salad. I chop mine up pretty well and find that it is easier to chew that way. You can also keep it whole and steam it in water on the stove-top. Steamed kale can be used in sandwiches, soups, casseroles, and other main dishes. You could even put it in your Mac N' Cheese.


Steamed Kale

1 bunch kale
1 cup water
1 clove of garlic (or 1/4 teaspoon garlic powder)
1 teaspoon onion powder
1 tablespoon bragg's liquid aminos

Prepare kale as mentioned above, then bring to a boil on the stove and then simmer for 20-30 minutes.


I crave this green smoothie quite often, and find that it is energizing and refreshing.

Orange Blaster Green Smoothie
From Dreena Burton's Let Them Eat Vegan!

Ingredients:

1 to 1 1/2 cups of kale leaves, washed and stalks removed (If you can handle more greens, go ahead, I actually add 4 cups of tightly packed kale to my smoothies. As a beginner, I recommend you stick with the 1 cup, smashed down tight)
1 cup peach, nectarine, or mango chunks (I used frozen, pre-cut from Trader Joe's)
Two oranges, peeled, or run through your citrus juicer (I add the pulp, too)
1/3 cup chopped carrot
1/2 to 3/4 cup of frozen banana
1/2 cup of vanilla, non-dairy yogurt (OPTIONAL; I find it tastes good either way)
1-2 cups of ice
Plus enough water to get it moving and thin out, if you like.

Instructions:

Starting with your greens, throw all of the measured ingredients into your blender and blend on high for 1-2 minutes until smooth. Enjoy cold and share with everyone!

[8/14/2012 UPDATE]: Lacinato Kale tastes even better in this smoothie - it is slightly less bitter than Curly Kale. I recommend Lacinato (also called Dino Kale) especially to those transitioning or just starting to eat more leafy greens.

Monday, June 4, 2012

DJ's Hummus Salad Dressing & What do you feed your kids?

I finally got my finished product of the kitchen re-org posted! Check it out.

Katie, one of our fellow salad-a-day challenge participants asked:

Where can I find oil free salad dressings?

Great question. One which will take time to answer. But, I do have a couple of tricks that I use in any salad dressing to replace the oil. I could teach you the method, or I could just post each salad dressing recipe individually. Preference?

And today's salad. Mexican Burrito Salad. Basic idea is spelled out below.


And yesterday's salad. This is Over the Rainbow Salad by Angela Liddon. (Click for the recipe).


I tried to modify her dressing to be oil free, and I ended up just throwing in an avocado, 1/3 cup of heaping chickpeas, and 1-2 tablespoons of agave nectar to sweeten it. The result was pretty good (you are welcome to try it out if you like), but I probably messed it up because I didn't use FRESH lemon juice; I used bottled lemon juice. Just a tad too sour!

So, I wished I had just made Dreena Burton's Hummus Salad Dressing. One of my all time faves. Hence my reason for posting the recipe for that one instead.


And my kids don't really eat salad. Well, Samuel my veggie lover will eat salads if the dressing is not too spicy. BUT, I am sure you are wondering. This is salad-a-day challenge month. After going to all the work to make salads, WHAT DO YOU FEED YOUR KIDS?

The answer simply lies in starches. Children don't like a lot of fancy spices or a bunch of foreign ingredients thrown together with different and unfamiliar tastes and textures. They want to eat the same boring stuff, over and over. No surprises.

Unless the surprise is dessert, of course!

For example: Mashed potatoes. Corn on the cob. Breads and baked goods. Pasta with marinara sauce.

Then grab their favorite fruits and veggies and use them as a side. My kids wanted olives and apple slices with this meal.

The point is, find your child's favorite starches, and build on them. When my children know that their food is based on their favorite familiar starch, they are much more likely to try the food, and like it.

Essie loves bean and rice Mexican burritos. Samuel eats them as long as I don't put anything fancy in them. No chopped veggies, no fake cheeses, no spices.


Since Essie has been asking for burritos, I got out the tortillas, the fat free refried beans, some long grain brown rice I had pre-cooked a couple days ago, the spinach, and Tofutti! Cream cheese (which my kids like, and I am NOT having them go oil-free).


I heated up the tortillas, refried beans, and rice, and then spread thick chunks of the Tofutti Cream Cheese on it, and tore up some spinach leaves and put it on top. For some reason my kids have decided that spinach is acceptable in a burrito. Maybe because spinach has been a known quantity in our house for so many years?

This is vegan baby's food.


Refried beans, brown rice, corn, heated through and mixed. She can feed this to herself:


I was hungry, and Paul took the Over the Rainbow Salad with him for his lunch today at work, so I just made my own burrito salad, sans the tortilla. I took chopped romaine lettuce, heated beans and rice, chopped a tomato, threw on some jalapeno sauce (pictured above, and no, I don't put that on my kids' food!) and sprinkled it with the leftover and modified lemon tahini dressing I had made yesterday. And VOILA! YUMMY Mexican Burrito Salad! Feel free to add cilantro, chopped cucumbers, or guacamole.

You can take a lot of meals you fix for your kids and turn them into a salad for yourself. One of my other faves is to make my kids mashed potatoes with corn on the cob and some toasted baked bread with honey, and round it out with baby carrots and mango juice. For myself: throw some spring mix on a plate, top with mashed potatoes, sprinkle with corn, salt, and pepper, and drizzle with BBQ Sauce. I did this for my salad on Saturday. Yeah! Everyone is happy!


Leave out the optional oil and you will have an oil free dressing with no compromise in flavor. I love this on chopped kale salad, but it goes well on Over the Rainbow Salad, or on the above Mexican Burrito Salad.

Dreena's Hummus Salad Dressing
By Dreena Burton


Ingredients (Makes about 3/4 cup)

1/4 cup chickpeas
1/4 cup water
2 1/2 tbsp tahini
1 tbsp freshly squeezed lemon juice
1 tbsp red wine vinegar
1 tsp tamari
1/2 tsp dijon mustard
2-3 tsp fresh oregano leaves (see note)(I actually prefer this dressing without the oregano)
1 very small clove garlic (or 1/2 small-med)
1 – 1 1/2 tsp pure maple syrup or agave nectar (or more to taste)
1/4 tsp sea salt
freshly ground pepper to taste
1-2 tbsp extra-virgin olive oil (optional; can omit for an oil-free dressing)


Instructions

In a blender or in a deep cup/jar using an immersion blender, puree until smooth. Season to taste with additional salt/pepper if desired, and using extra garlic to taste.
Makes about 3/4 cup.

Notes:
If you don’t have fresh oregano, don’t use dried. Keep the flavor more vibrant and fresher, and instead of using dried oregano, try adding a tbsp or so of chopped parsley, or a lesser amount of other fresh herbs like thyme or rosemary (1-2 tsp). Fresh herbs can be omitted, however, and this will still have good flavor.
Other seasoning options include adding 1 tbsp nutritional yeast, or 1-2 tbsp chopped sun-dried tomatoes, 1-2 tbsp green onions, or 1 tsp toasted sesame oil.
Our kids love this dressing as-is, but you might want to try omitting the oregano and using the nooch sub mentioned above – try 1 tablespoon to start, and then add more if you like.
Not just for drizzling on a common green salad, try tossing through julienned leafy greens like kale and chard. The dressing softens the greens and you’ll find it’s somewhat addictive to eat your beans ‘n greens. Then add other salad fixings like chopped avocado, grated carrot, cherry tomatoes, chopped cukes, dried cranberries… whatever works for you!